今回はWindows11のタスクバーから「デスクトップの表示」が消えた時の対処法について解説を行います。
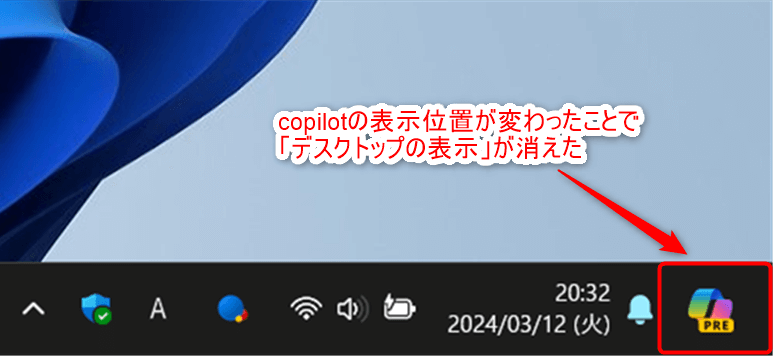
デスクトップを表示したい時にタスクバーの右端にある「デスクトップの表示」を使用する事は多いと思いますが、2024年2月の月例アップデート(23H2 KB5034765)によりタスクバーの「検索」横にあったcopilotの表示位置が右端に変更になった事で表示が消えました。
あの機能が無いと個々のアプリに対して「最小化」や「閉じる」をしなければデスクトップを表示できないから面倒だなぁ・・・
安心して下さい!実はこの機能簡単に再表示する事ができます!
今回はその方法も含め瞬時にデスクトップを表示させる3つの対処法について解説するので、自分に合った方法を試してみて下さい!
- Windows11のタスクバーに「デスクトップの表示」を復活できる。
- 「デスクトップの表示」以外で瞬時にデスクトップを表示する方法が分かる。
この記事の結論
先にこの記事の結論について述べます。
- 「デスクトップの表示」を再表示させる
- ショートカットキーを用いてデスクトップを表示させる
- デスクトップの表示を行うショートカットを作成する
こうして見ると色んなやり方があるんですね!
デスクトップの表示を従来通りワンクリックで表示させたいなら①か③、キー入力で済ませるなら②の方法がオススメです!
「デスクトップの表示」を再表示させる
タスクバーから消えてしまった「デスクトップの表示」は次の手順で再表示することができます。
- 「タスクバーの設定」を表示
- 「タスクバーの動作」の設定項目を変更する
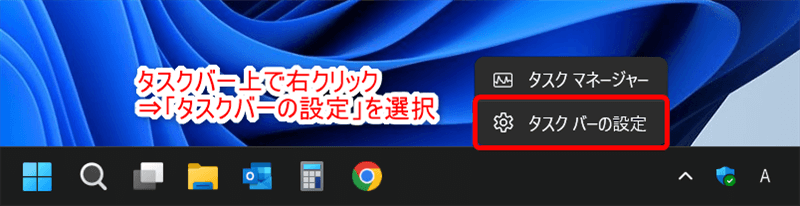
「タスクバーの設定」を表示
タスクバー上で右クリック⇒「タスクバーの設定」を選択します。
タスクバーの設定画面を表示させます。
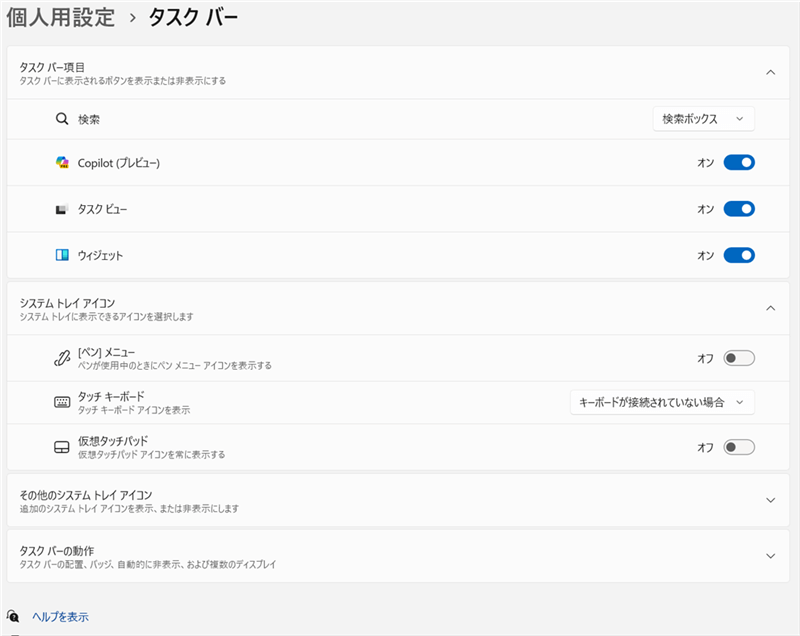
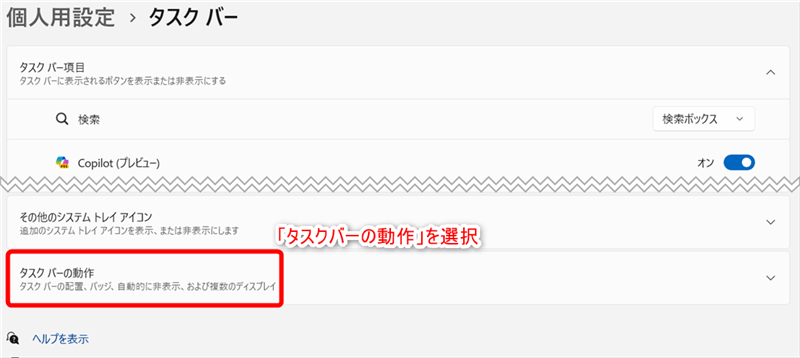
「タスクバーの動作」の設定項目を変更する
設定項目の「タスクバーの動作」を選択します。
設定項目の「デスクトップを表示するには、タスクバーの隅を選択する」に
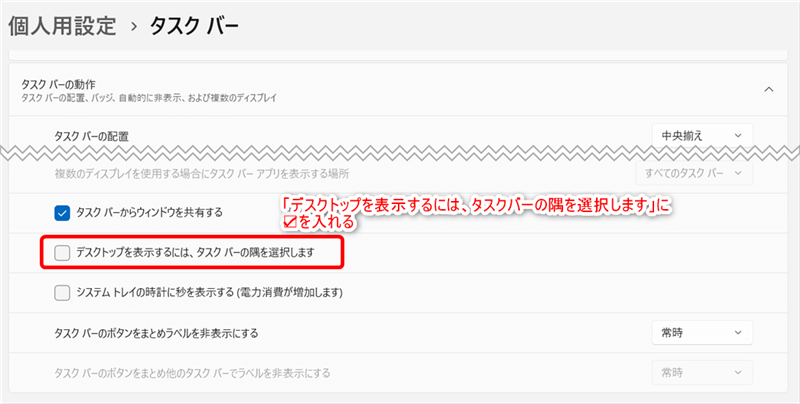
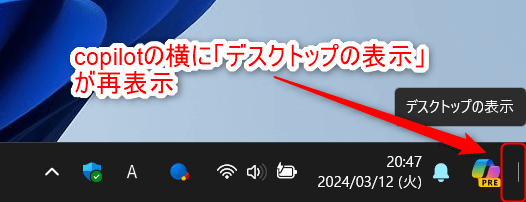
設定後、タスクバーの右端に「デスクトップの表示」が出ていれば完了です。
ショートカットキーを用いてデスクトップを表示させる
「デスクトップの表示」を使わなくても、ショートカットキーで同様の処理が実行できます。
【】+【D】
複数のウィンドウを立ち上げている状態でショートカットキー【】+【D】を入力します。

入力後「デスクトップの表示」機能と同様にデスクトップが表示されます。

デスクトップの表示を行うショートカットを作成する
デスクトップの表示を行う機能はショートカットで作成することが可能です。
このショートカットをタスクバーへピン留めする事によって、前項で述べた「デスクトップの表示」と同様にワンクリックでデスクトップを表示することができます。
- 右クリックメニューよりショートカットの新規作成を選択
- ショートカットの設定を行う
- ショートカットをタスクバーへピン留めする
右クリックメニューよりショートカットの新規作成を選択
デスクトップ上で右クリック⇒「新規作成」⇒「ショートカット」を選択します。
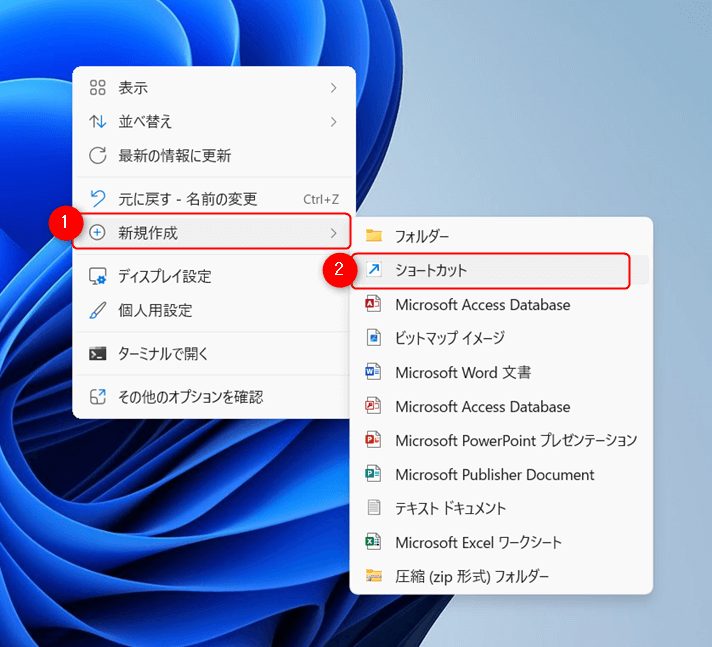
ショートカットの作成画面が表示されます。
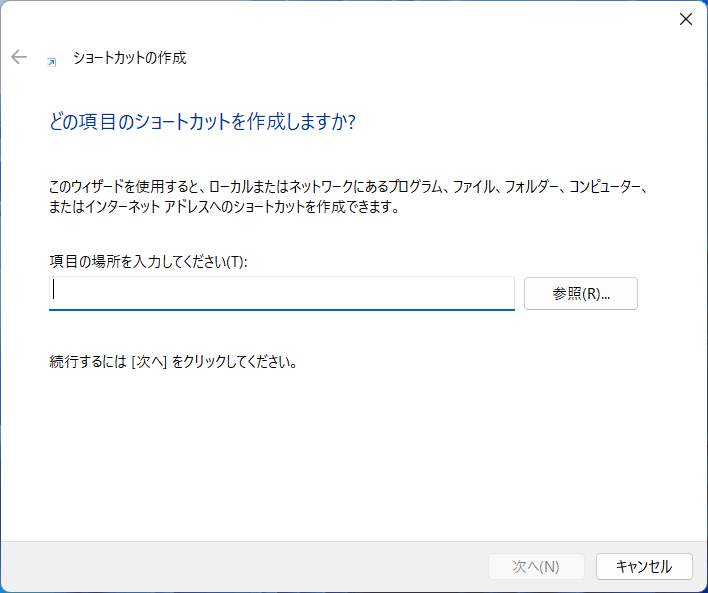
ショートカットの設定を行う
ショートカットの「項目の場所を入力して下さい」に次の内容を入力し、「次へ」を選択します。
explorer.exe shell:::{3080F90D-D7AD-11D9-BD98-0000947B0257}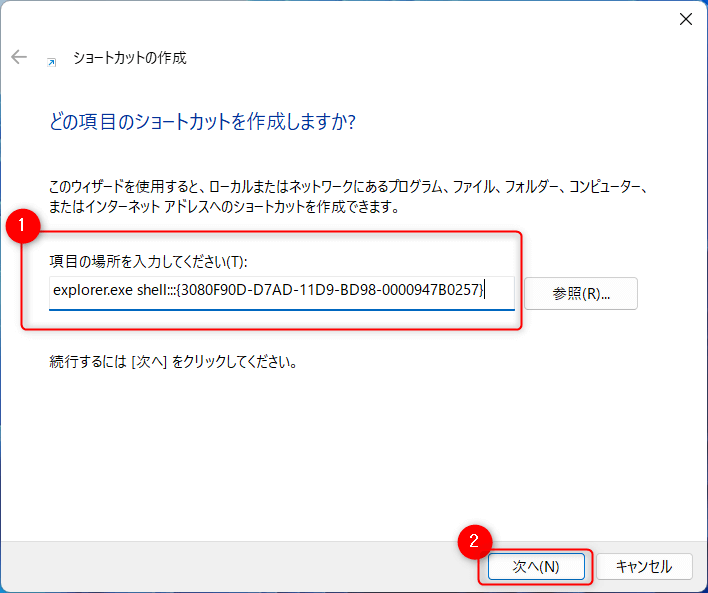
ショートカットの名前を付け、「完了」を選択してショートカットを作成します。


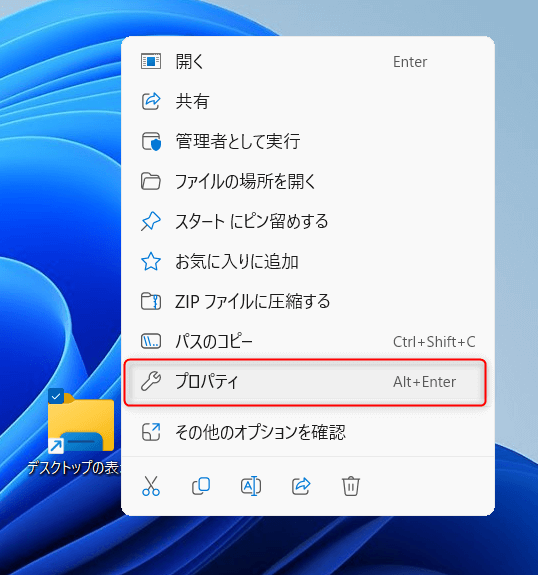
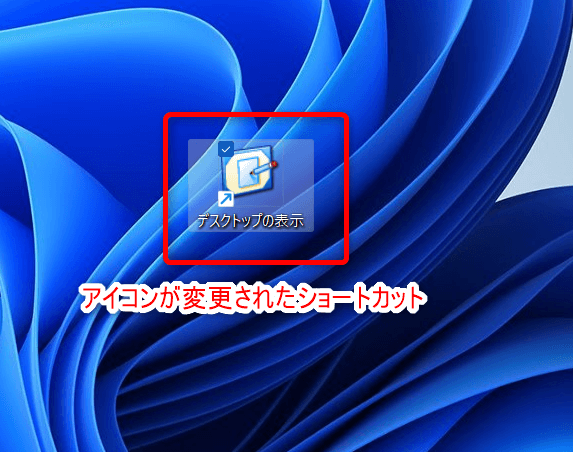
作成は以上で完了ですが、このままだとエクスプローラーと見分けがつかないので、アイコンを区別しやすい物に変えましょう。
作成したショートカットを右クリック⇒「プロパティ」を選択。
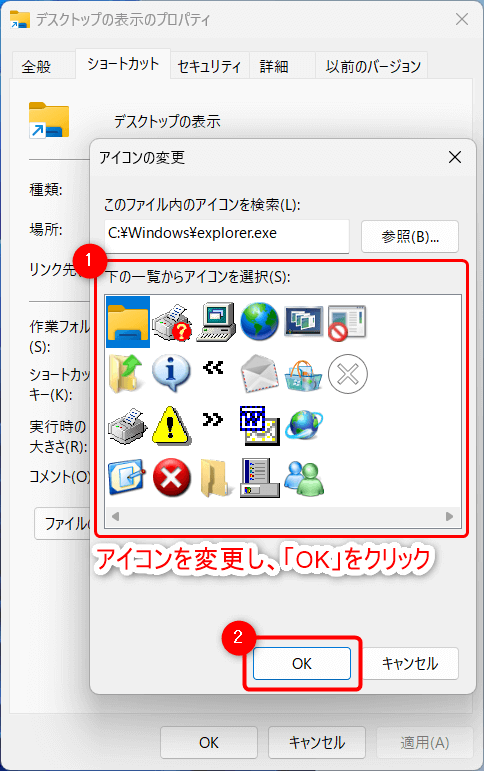
プロパティの「アイコンの変更」を選択。
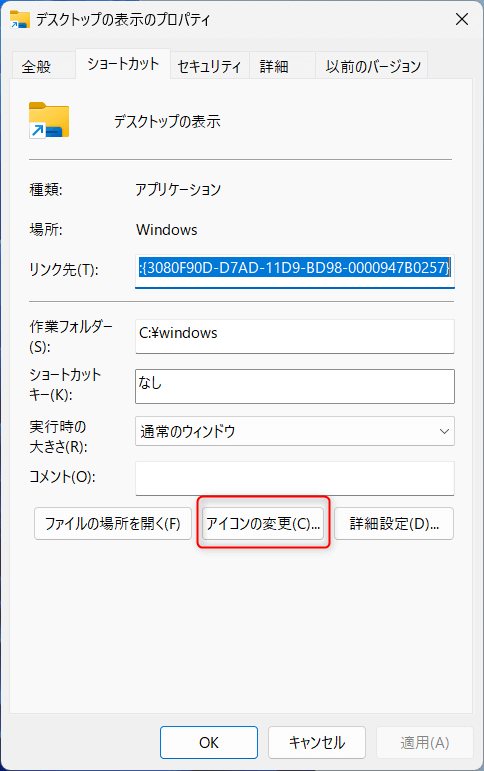
アイコンを変更し、「OK」を選択。
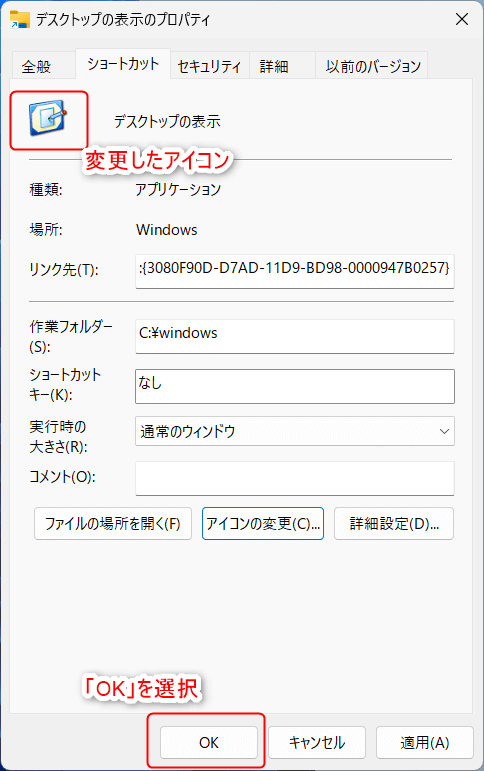
アイコンが変更されるので「OK」を選択し、作業を確定させます。
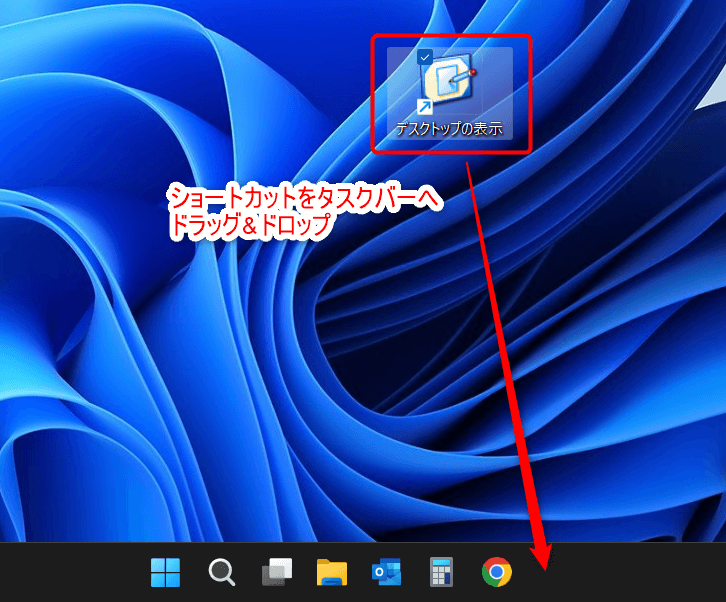
ショートカットをタスクバーへピン留めする
完成したショートカットをタスクバーへドラッグ&ドロップでピン留めさせます。
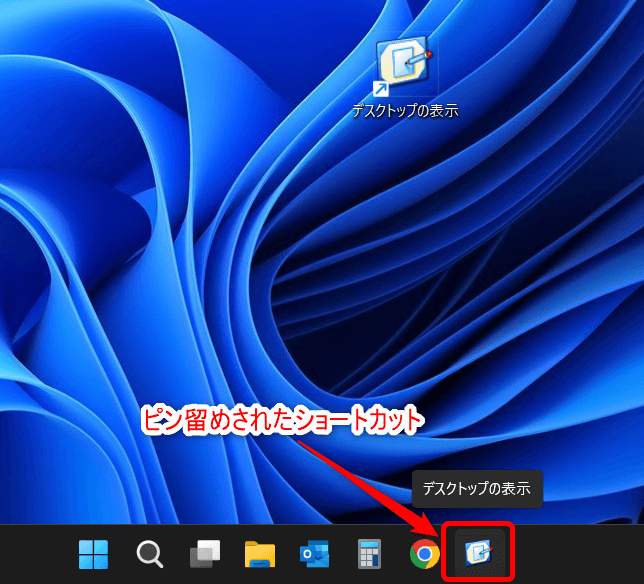
元々の「デスクトップの表示」よりも見やすくて、こちらの方が使いやすそう!
このピン留めされたショートカットを使うことで、デスクトップをワンクリックで表示する事ができます。
終わりに
以上で今回の解説を終了します。
Windows11のタスクバーから「デスクトップの表示」が消えた時は次の3つの対処法があります。
- 「デスクトップの表示」を再表示させる
- ショートカットキーを用いてデスクトップを表示させる
- デスクトップの表示を行うショートカットを作成する
どの対処法も手軽に実行できるので、表示が消えて困った時はぜひ試してみて下さい!

